Here is how I do it.
1. Take the case and PSU out of their boxes. Screw the PSU into the case using 4 screws (the case or the PSU should come with them). The screws in the rear of the PSU, it will be come obvious when you do it. Then plug the PSU into the mains using the provided mains cable, but make sure the PSU is turned off. Touch one of the screws you just installed. <-- This is very important. This grounds out any charge in you and prevents damage from ESD, which can wreck the components.
2. Install the motherboard standoffs in the case, be careful to install them in the correct places, and only install the number you need. The standoffs are brass and usually gold in colour, and they prevent the board from shorting out on the case. They come with either the case or the motherboard, usually the case I think.
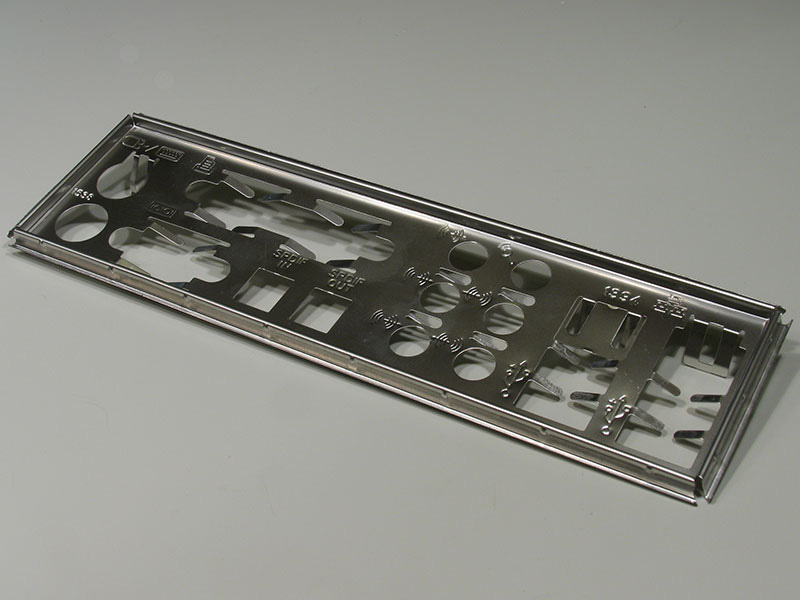
3. Open up your motherboard box and install the I/O shield into the rear of the case. It's usually silver or black and looks a bit like this:
It will only go in one way, but it snaps into place.
4. Carefully place the motherboard in the case on the standoffs and make sure the I/O shield lines up with the board nicely. You may have to move it around a little. Once you are happy, screw the board into the standoffs.
5. Now it's time to install the CPU. Remove anything obstructing the CPU socket, then move the lever on the right side of the CPU socket out, and then up. Then make sure the CPU is lined up correctly with the socket, drop it into place (careful not to touch any of the contacts!) and then pull the lever down and then back in to secure the CPU. Install the cooler once you have done this. The Intel stock coolers just push into the motherboard if memory serves me right.
6. Now it's time to install your RAM. Put each stick into the RAM bays and make sure the sticks go firmly in. They will only go in one way, so don't force them too hard if they don't fit. Most boards have 2 RAM bays - if you are using two sticks, it's best to use bays 1 and 3 or 2 and 4. If you are populating all the bays, it doesn't matter where the RAM goes.
7. Next I install the optical drive and hard drives. How this is done varies between each case, but usually what you do for optical drives is remove the blanking cover in the top of the case, then slide the drive in. For HDDs, it varies, but it should be fairly self explanatory. Your case will come with instructions anyway.
8. Time to route the cables and plug them all in. The first cables I plug in are the motherboard connections - things like the power button and the reset switch and the LEDs. These usually plug into the bottom right hand corner of the motherboard. Your motherboard manual will tell you where exactly each cables goes.
When are routing cables it is important to use the cable management holes your case provides, to ensure good airflow and good looks. Plug any power connections into devices which need them. Remember to plug the SATA data cables into the motherboard too!
9. I tend to install the GPU last. It's easy to install. Remove any blanking covers from the rear of the case which need to be removed, and then just put the card in the PCI Express slot on the motherboard. Attach any additional power connectors which need to be attached and job done.
That is a very quick guide to building a PC. Everybody builds them differently, but that is usually the order I do things in.

It's only pretty rough and doesn't go into great detail.
